Tuesday, December 31, 2013

Centerboard Trunk Assembled, Working on Noseblock

Centerboard Trunk


Noseblock in Progress
Here is the centerboard trunk all assembled.  I have done the preliminary sanding and now it is ready to have the keel sides attached.  But several other operations have to be accomplished first.


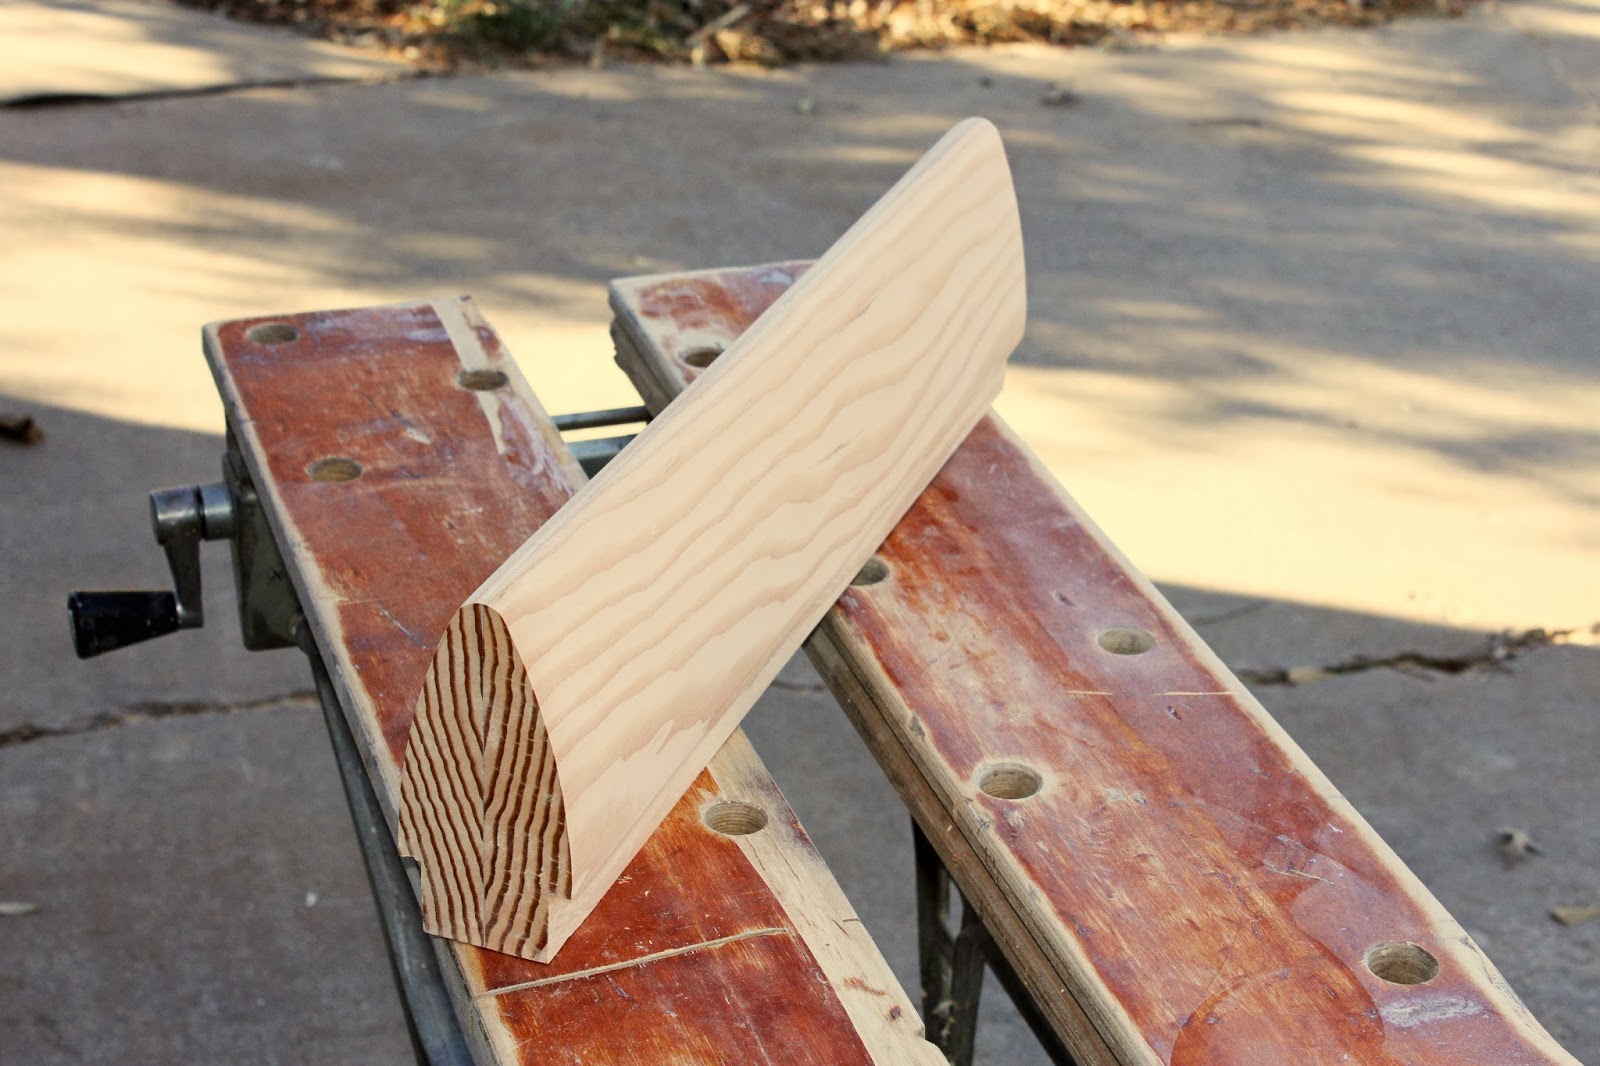
This is the noseblock, which now needs angled cuts at the top  and bottom. It started out as two chunks of 2x6 glued together.
I like to be able to show this kind of picture to those who ask if my boats are made from a kit and when I say yes, give a look that seems to say, "Oh, then all you had to do was put it together, like a model airplane."  The truth is, there is a lot more to it than that.  I improved my woodworking skills and learned many new skills building my previous two boats, a kayak and a sailing dinghy.  About all the PocktShip kit contained was the pre-cut plywood parts, some epoxy and epoxy thickeners, fiberglass cloth, and a few other odds and ends.  Loads of wood parts, like this noseblock and the spars (beams used to support the sail and so on) are all made from standard lumber.  That being said, my hat is off to those who build from plans.  I don't know if I would ever finish this project if I tried to build it from plans, and it would probably cost me more than the kit because of all the botched plywood parts I would have to throw out.  The plywood parts in the kit are precision-cut with a computer (CNC router).

Noseblock Ready for Second Cut

Here, the lower, straight noseblock cut has been made with the table saw.  The upper cut is curved (can't tell from the picture) so I will have to make that cut on a bandsaw. 

You may have noticed the safety cover is removed from the table saw.  I could not figure out a way to make the cut with it or the kickback pawls attached.  The riving knife at the back of the blade is still there--a big help.
Sunday, December 29, 2013

Centerboard Trunk, Noseblock


The high today is predicted to be 31 degrees (yesterday's high was 61), so rather than heat the garage I'm curing the glue on the centerboard trunk and noseblock (bullet-shaped piece at the front end of the keel) blank indoors.  The keel, when viewed from below, will have an airfoil-like shape, i.e., bullet nose widening to 1 3/4", staying at that width along the trunk, then tapering to 3/4" from the centerboard trunk back to the transom (squared-off piece at the back of the boat).
Glued Centerboard Trunk and Noseblock Blank Curing in Dining Room
The blank from which the noseblock will be milled is supposed to be 2 1/4" x 4 1/4" x 18", so I am gluing together two 18" 2x6's to get the size wood block I need.  A "2x6" these days is only about 1 1/4" x 5 1/4", but two of these laminated together will give me a 2 1/2" by 5 1/4" chunk, so that will work.


I'll try to find some more indoor jobs I can do today without heating the garage, but first I have to help Jan make datenut bread. :-)

Friday, December 27, 2013

Centerboard Trunk Pivot Holes, Blocking


Yesterday, along with my friend and neighbor, Dave Hardy, we drilled the holes for the centerboard pivot in the centerboard trunk and keel sides.  The parts came with the holes pre-drilled to 1/2".  The idea is to fill the holes with thickened epoxy, then drill 3/8" holes for the pivot rod in the middle of the epoxy fill.  That way, the wood is sealed and impervious to water penetration (the centerboard pivot is below the waterline).  It was Dave's very good idea to drill a 1/4" hole in all the parts first, then put the drill bit back  in the holes while we clamped all four parts together.  Then, after removing the drill bit, we drilled the holes in all four parts at the same time.  That way I can be sure all the holes will align properly when I assemble the centerboard and keel.  (You'll see how that comes together later.)

The next step is to glue on the blocking that goes between the two sides on one side of the trunk.  The blocking is needed to keep the two sides of the trunk wide enough apart for the centerboard to slide into.  For no particular reason, I started with the port-side half.  The port side is the left side of the boat facing forward.  A red running light is always on the port side and a green light on the starboard (right) side.  Simple mnemonic: "Is there any red port left?"
Gluing Blocking to Port-side Half of Centerboard Trunk

After that cures, I'll glue on the other side, using a 3/8" rod to make sure the two pivot holes are properly aligned.  You can see one of the pivot holes in the lower right corner.  It looks white because the epoxy is thickened with colloidal silica powder.


Kit Ordered, Starting on Spars, Centerboard Trunk


I ordered the kit for the CLC PocketShip in early October, 2013. Click here to see the boat and learn more about it if you wish.  After learning that it would not arrive until late November, I decided to get started on the spars, since they are not part of the kit.  The spars include the mast, boom, bowsprit (long beam that juts out from the bow), and yard (gaff--beam that attaches to the mast and raises the peak of the sail higher than the mast).  I ordered some nice, clear pine and began laminating pieces together to create the spars.  Below is a shot of the boom and bowsprit being glued-up. All gluing is done with epoxy thickened with colloidal silica powder.

Some of the Spar Blanks Being Laminated


(My concern was trying to include everything in the photos, not getting them level.)

The mast is hollow and is made from four 16-foot staves (side pieces), and tapers as it goes up.  I don't have any pictures, but I do have the staves cut and two of them rabbeted to fit the other two.  This is a pretty complicated process, and I will probably have to re-build one of the staves.  I've done some shaping on the other spars, but they are all in storage now, because the kit has arrived.


Now that the kit has arrived, the first step is to build the centerboard trunk (a hollow, watertight box that contains the centerboard when it is up--when sailing, the centerboard is dropped down to help keep the boat from moving sideways).  It is critical to get everything just right because the trunk is integral to the keel and is part of the main structure.  If anything goes wrong it will be next to impossible to get at it for repairs.  So I'm taking my time.  Here's a shot of the two sides of the trunk after fiberglass and three coats of epoxy have been added to the inside surfaces:
Centerboard Trunk Halves with Final Graphite/Epoxy Coat

After reading some posts on the PocketShip forum, I decided to deviate a little from the manual.  I added graphite to the final epoxy coat.  That will make it super-hard and very slick for the centerboard to move up and down in it.  The centerboard will get the same treatment.