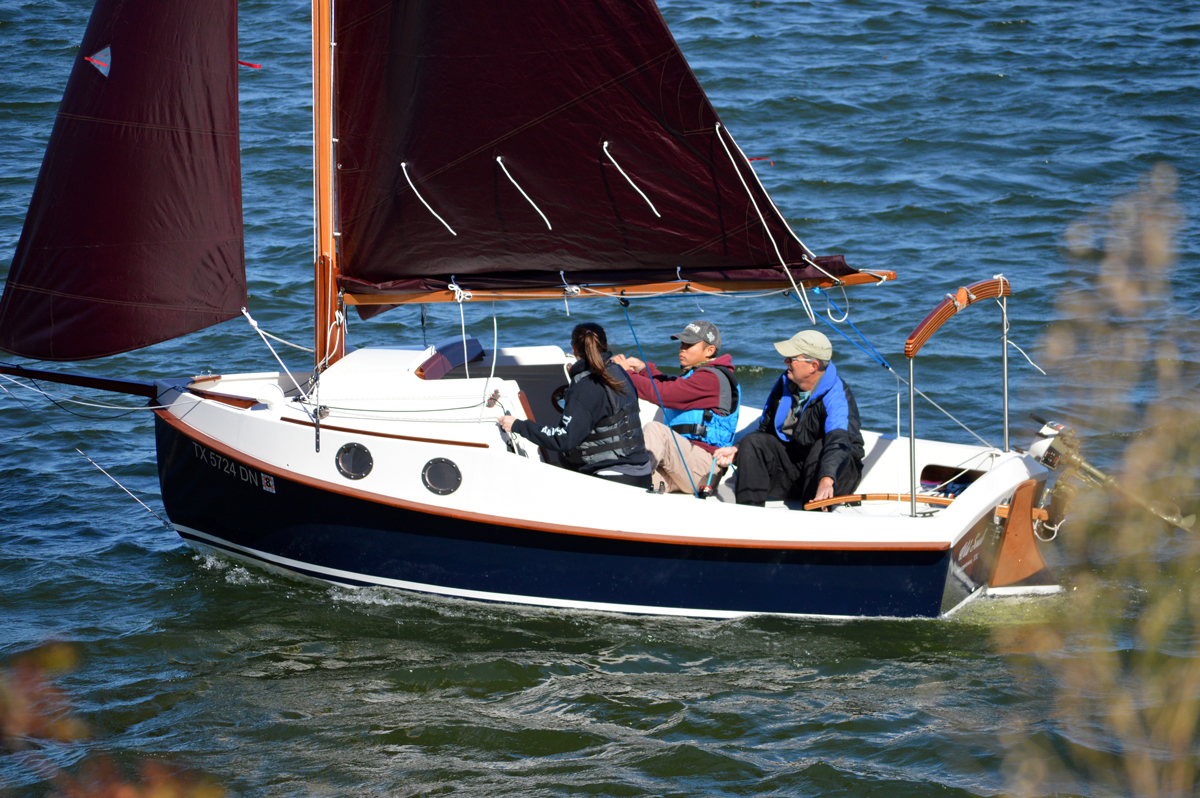
I have most of the boat itself finished, except for the interior of the cabin which I may wait until winter to work on. The boat is now living outside so I have room to work on the spars and, more importantly, get Jan's car back in there! Here's a shot of the boat now sitting out in the yard. It's a bit over-exposed so there is some lack of detail, especially at the bow end.
Another shot from the stern end:
I got the dropboards (actually they are acrylic) assembled and in place. The lock won't do much to prevent entry, but at least it will require breaking in, which should keep casual thieves away.
I don't have a shot yet, but this morning I added a lip on the companionway hatch slide so it covers more of the dropboards. I'm afraid, though, that the lip will just channel the water to each side where it can pour right in--we'll just have to see. Still, it won't be much of a problem, just a bit of water I'll have to pump out now and then. [UPDATE: Yesterday I noticed near the back of the manual that you are supposed to insert a block under the hasp to move the hatch back over the drop boards about 1 1/2", so rain won't flow into the cabin. I'm working on that now.]
Here's a shot of the solar panel now that it is installed. I'm amazed that I was able to find a panel with dimensions that almost exactly match the companionway hood. It's almost as if it were designed for this boat.
My next job is to finish the mast, spars (boom and gaff), tiller, gallows, and tabernacle. I have those items all built, but what I have to do now is drill a few holes here and there, cover each part with three coats of epoxy, then three or more coats of varnish. I anticipate that taking two-to-three weeks, and then I do the rigging. I am still on schedule (just barely) to get the boat on the water before it gets too cold.
Thursday, September 24, 2015
Monday, September 14, 2015
Non-slip Mats, Ballast, Epoxy Problems
Non-slip mats are installed in the anchor well . . .
on the cabin deck . . .
and in the cockpit footwell. In this shot you can also see that I have painted inside the small storage "lockers." Later I added thick rubber shelf liners inside the lockers to protect them. That blue thing is electrical conduit I ran inside the seat backs. It continues inside the cabin and into the front compartment. Looks kind of ugly but for me function trumps form in this instance.
I have also added the lead ballast to the bilge compartments on each side of the centerboard trunk.
Before dropping in the ballast I installed thick rubber mats to protect the hull. I forgot to take pictures of the mats beforehand, but you can see them in the compartments aft of the ballast compartments. I decided to put the mats in those compartments in case I need to add more ballast.
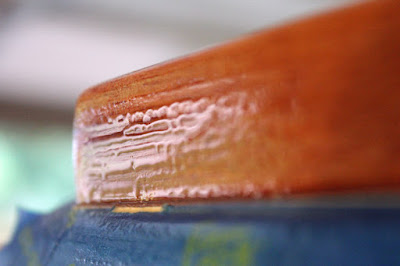
I've been having considerable problems with the epoxy curing "lumpy" on the mahogany strips (toe rails, companionway slides, etc).
Every time I tried to sand these areas smooth (very carefully with 220 grit) I always ended up sanding through to bare wood in spots. So I had to re-apply the epoxy, wait for it to cure and sand again. Every time I again had bare wood exposed. This was getting to be a vicious cycle and I felt I would never finish the boat. This is the biggest problem I have ever had with MAS epoxy. It's possible there is still enough sap in the mahogany to be causing this.
So I got on the builders' forum to ask for any suggestions or perhaps recommendations of a different brand of epoxy. The consensus was that there are contaminants on the wood in spite of all my precautions. So today I sanded a small section bare, thoroughly cleaned it with alcohol, and tried again. Here is the result:
There may be a slight improvement, but I have no doubt my attempts to sand off the lumps will result in more spots sanded down to bare wood. So my decision is to sand all the mahogany strips down smooth--mostly to bare wood, and then varnish them. I will probably have to re-varnish those areas every year or two, but that won't be too bad. I plan to leave the inner sides of the toe rails fairly rough so I don't sand through because water will collect there and could do more damage.
on the cabin deck . . .
and in the cockpit footwell. In this shot you can also see that I have painted inside the small storage "lockers." Later I added thick rubber shelf liners inside the lockers to protect them. That blue thing is electrical conduit I ran inside the seat backs. It continues inside the cabin and into the front compartment. Looks kind of ugly but for me function trumps form in this instance.
I have also added the lead ballast to the bilge compartments on each side of the centerboard trunk.
I've been having considerable problems with the epoxy curing "lumpy" on the mahogany strips (toe rails, companionway slides, etc).
Every time I tried to sand these areas smooth (very carefully with 220 grit) I always ended up sanding through to bare wood in spots. So I had to re-apply the epoxy, wait for it to cure and sand again. Every time I again had bare wood exposed. This was getting to be a vicious cycle and I felt I would never finish the boat. This is the biggest problem I have ever had with MAS epoxy. It's possible there is still enough sap in the mahogany to be causing this.
So I got on the builders' forum to ask for any suggestions or perhaps recommendations of a different brand of epoxy. The consensus was that there are contaminants on the wood in spite of all my precautions. So today I sanded a small section bare, thoroughly cleaned it with alcohol, and tried again. Here is the result:
There may be a slight improvement, but I have no doubt my attempts to sand off the lumps will result in more spots sanded down to bare wood. So my decision is to sand all the mahogany strips down smooth--mostly to bare wood, and then varnish them. I will probably have to re-varnish those areas every year or two, but that won't be too bad. I plan to leave the inner sides of the toe rails fairly rough so I don't sand through because water will collect there and could do more damage.
Saturday, September 5, 2015
Cockpit and Topsides Sanded and Painted
The next step is sanding the primer before final painting.
You can tell from these photos that most of the primer has been sanded off, leaving only the low areas, scratches, and other defects. Seems like a waste, but what remains is very smooth, and I guess having very little primer left means I did a pretty good job smoothing in the first place!
This morning I painted on the first of the finish coats in the cockpit, on the topsides, and on the companionway hood.
If you look carefully at these photos (click on them to blow them up) you will see brush strokes and other flaws. Each coat is very thin, but as you will see the subsequent coats will look much better. A reminder, the blue strips are masking off mahogany that will be varnished (bright finished).
You can't tell from these photos, but the cockpit footwell floor, the upper deck, and the anchor well floor are mostly unpainted. They will be covered by non-slip mats that have adhesive backings. The mats stick very well to painted surfaces, but they probably stick even better to unpainted areas, and why waste the paint? When I photograph subsequent coats I'll try to remember to show those areas.
In the below shots, you can see that I have finished painting the topsides. I have also peeled off the masking tape on the rub rails and some of the port toe rail. I like to peel the tape off before the paint has cured completely, but decided to stop at this point because it's still a little too soft.
You can't tell from the above photo, but I will have to sand and repaint the top of the companionway hood. I had allowed the paint to get too low in the roller tray and it was starting to cure, which prevented me from getting the smooth surface I wanted. Repainting will be a fairly easy job, and I may wait and do it this winter. There are a couple small "holidays" inside the cockpit that I will also repair at that time.
In the above shot of the cockpit you can see the unpainted section on the floor of the footwell, where I will be installing a non-slip mat.
Part of the cabin deck is also left unpainted. Two more nonslip mats will be attached on each side of the deck, and there will be a couple mats forward in the anchor well. The mats are especially needed on the cabin deck because I will have to walk on it to access the anchor well. And as I said earlier, the non-slip mats in the anchor well will make it safer, and also help prevent damage by the anchor.
You can also see one of the areas I have yet to finish inside the cabin. Again, I may wait until winter to finish working in there.
 |
| Most of primer sanded off in cockpit |
 |
| Most of primer sanded off on topsides and companionway hood |
This morning I painted on the first of the finish coats in the cockpit, on the topsides, and on the companionway hood.
 |
| Cockpit -- first coat |
 |
| Topsides and companionway hood--first coat |
You can't tell from these photos, but the cockpit footwell floor, the upper deck, and the anchor well floor are mostly unpainted. They will be covered by non-slip mats that have adhesive backings. The mats stick very well to painted surfaces, but they probably stick even better to unpainted areas, and why waste the paint? When I photograph subsequent coats I'll try to remember to show those areas.
In the below shots, you can see that I have finished painting the topsides. I have also peeled off the masking tape on the rub rails and some of the port toe rail. I like to peel the tape off before the paint has cured completely, but decided to stop at this point because it's still a little too soft.
 |
| Topsides Panels and Companionway Hood Painted |
You can't tell from the above photo, but I will have to sand and repaint the top of the companionway hood. I had allowed the paint to get too low in the roller tray and it was starting to cure, which prevented me from getting the smooth surface I wanted. Repainting will be a fairly easy job, and I may wait and do it this winter. There are a couple small "holidays" inside the cockpit that I will also repair at that time.
 | ||
| Inside Cockpit Painted |
 |
| Cockpit Front and Cabin Deck |
You can also see one of the areas I have yet to finish inside the cabin. Again, I may wait until winter to finish working in there.
Subscribe to:
Posts (Atom)


