Friday, February 21, 2014

More Centerboard Work and Starting on Floor Supports

Gluing Brush w/Epoxy Plug
I want to start with a plug for the gluing tools from Rockler Woodworking.  They have lots of "cool tools" but these are some of my favorites.   In this shot the thickened epoxy plug was simply "flicked" off the brush end of the tool after it had cured.  The other end of the tool has a spade tip which is useful for cleaning up epoxy runs and squeeze-outs.  I also use it for mixing epoxy.  The kit I purchased also has a toothed glue spreader and mixing tray.  The cured epoxy is easily removed from them as well.  These tools are advertised for use with regular glues, but I was happy to discover they also work well with epoxy.

Dynel Cloth Filled with Thickened Epoxy
 Here the dynel cloth I put on the leading edge of the centerboard has been filled with silica-thickened epoxy.  The silica made the epoxy flow to a smooth finish--which you can't really tell from this picture
Floor Joists and Stringers


While waiting for the centerboard work to cure I glued stringers to the plywood floor joists.  You can see a few of them here.  The stringers are to provide a surface to attach the floorboards to. The two long joists will go all the way across, while the half-joists will go on either side of the centerboard trunk.  For proper balance and pointing ability the centerboard trunk must intrude into the cuddy. 


Centerboard with Graphite/Epoxy
 While the joists are curing I have coated one side of the centerboard with two coats of epoxy and graphite mix.  This will make the board very slick and less prone to scratches and dings.  The board is very glossy and if you click on the picture to enlarge it you will see some small bumps caused by bubbles.  The bumps will be sanded out very easily, then the entire board will be sanded as smooth as possible.  It will no longer be glossy after the sanding, but it will be very smooth, as "smooth as marble" according to the instructions.  They sanded their board all the way down to 400 grit on the prototype so I will do the same.  This will result in what I think will be a very beautiful board, that will never be seen again until the boat is scrapped--many, many years from now I hope

Skerry Rudder and Daggerboard with Graphite/Epoxy
Winter repairs on the Skerry must also continue.  I did some sanding and touchup work on the hull, and decided to give the epoxy/graphite treatment to the daggerboard and bottom part of the rudder.  These two parts will be exposed to the sun from time to time, so after all the sanding is finished they will get a couple coats of marine varnish for protection from UV rays.

Thursday, February 13, 2014

More Work on Centerboard


I haven't had a chance to do much lately, but starting tonight I am going to again try to work on the boat at least 20 or 30 minutes, 3-5 nights a week, in addition to weekend work.  The upcoming three-day weekend promises near perfect weather (upper 60's and low 70's) so I am going to try to put in as much time as I can.

Tonight I did a little work on the centerboard.  I put a second coat of epoxy on one side and applied a strip of dynel cloth to the leading edge and around the corner onto part of the trailing edge:

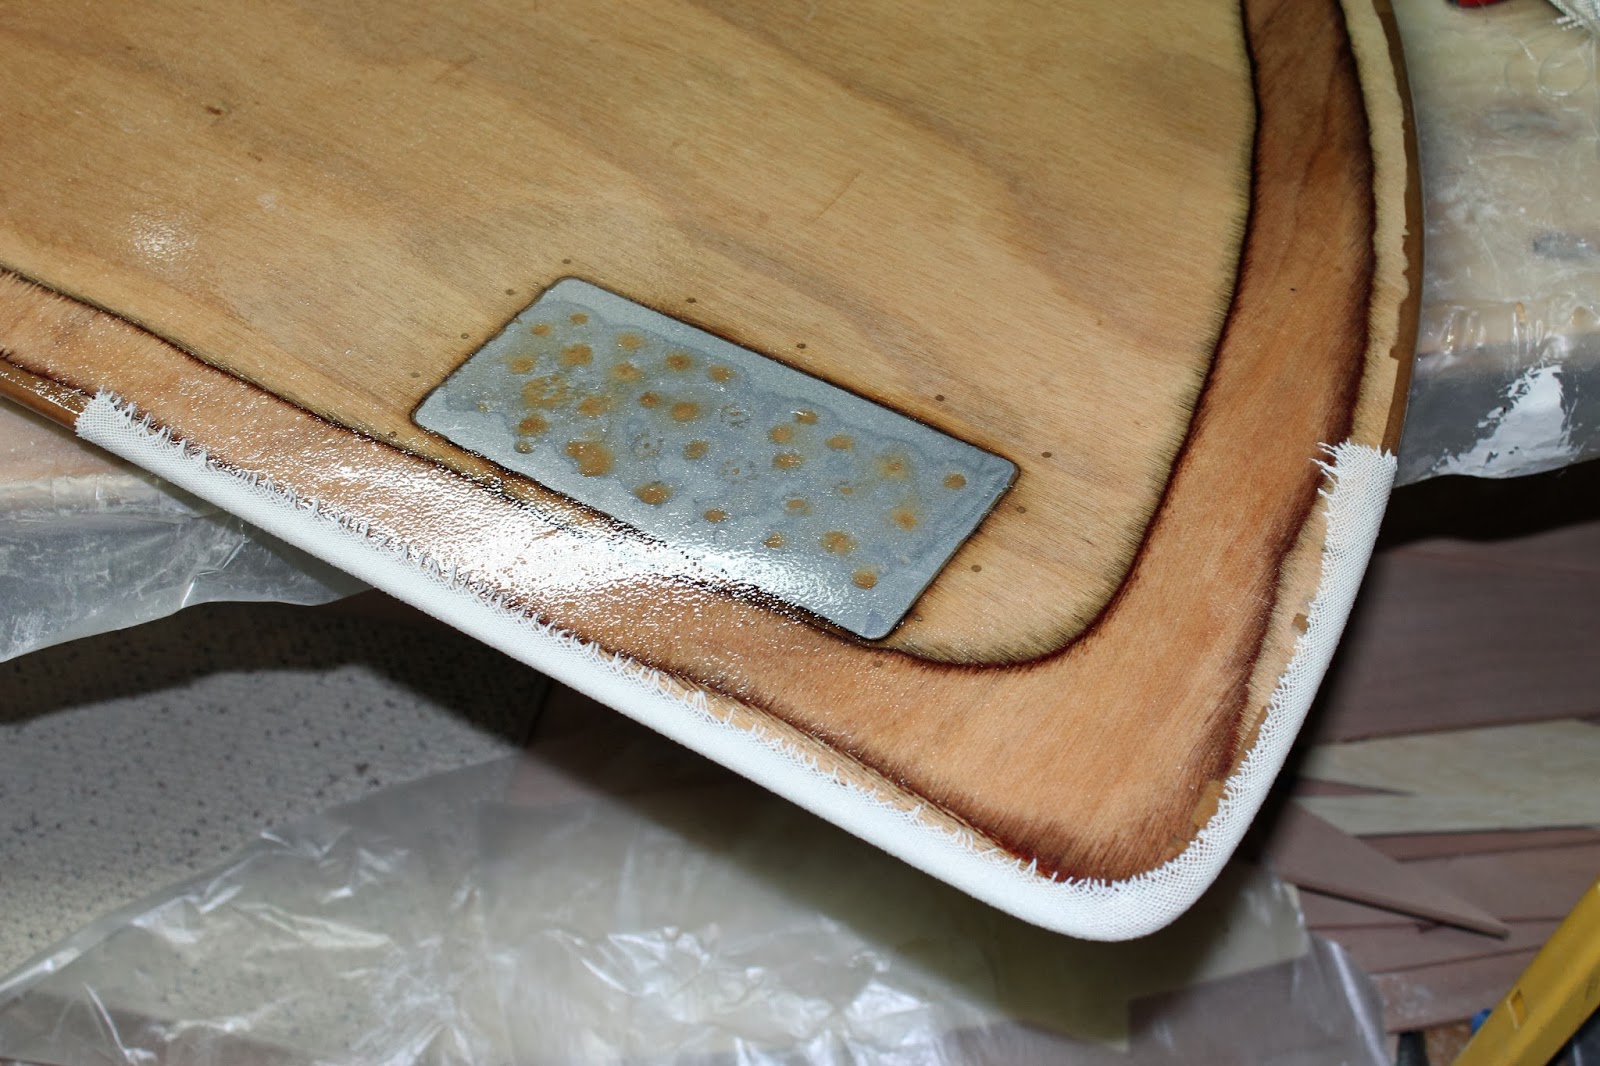
Dynel Cloth Applied to Edge of Centerboard
The final coat to the centerboard will include graphite in the mix.  This will make the board very slick and combined with the dynel cloth should make the edges very tough.  I used the combination to create rub strips on the bottom edges of my kayak and so far it has protected it from many abrasions, including rubbing concrete while being transported to the lake.  So I think this treatment along with the epoxy fill all around the leading and trailing edges should protect it very well from unseen underwater objects like rocks and rip-rap.

I have a couple strips of dynel cloth left and I will use them, along with graphite-ized epoxy to treat the noseblock and front end of the keel bottom.  I know this seems like overkill, but I'm pretty bad about running into things in our small lakes around here.  I'm trying to make this boat as "bullet-proof" as I can.

I have run aground a few times with the Skerry, and the daggerboard brought it to an abrupt stop.  I am amazed nothing broke.  The leading edges of the daggerboard and rudder have had some of the epoxy coating rubbed off, so I plan to give them the graphite treatment also--perhaps some dynel cloth on the daggerboard too, but on a boat that light it might add significantly to the drag.  I'll have to get on the CLC forum and see what others think about that idea.  The graphite by itself will add some toughness and make it slicker at the same time, so I'm pretty sure I'll do that at least.

Well I digress.  I'm going to wait a while before posting again so I'll have more to show.

Sunday, February 2, 2014

Centerboard Fairing and Fiberglassing

A busy weekend, so I haven't got a lot done.  I did find some time to work on the centerboard.
Centerboard Weight Smoothed

Leading and Trailing Edges Faired
This shot is of the centerboard lead weight and some of the fairing (more about that later).  The weight was smoothed with a grinder and cabinet scraper (rectangle of very hard steel), then sanded smooth.  The low areas and screw holes will be filled in with thickened epoxy.  The screw holes are from temporary screws used to hold a plywood scrap on the other side during the lead pour.


Here is an overall shot of the centerboard after the leading and trailing edges have been "faired."  That is, they were tapered on the leading and trailing edges.  The leading edge was faired to a width of about 1 1/2" and the trailing edge (to the left in this picture) was faired to a width of about four inches.  Fairing was done with the grinder and finished with the sander.  (All this work was done last weekend.)

Centerboard 'Glassed on Port Side
And finally, the centerboard after yesterday's application of fiberglass cloth and epoxy to the port side.  Next (today I hope), the starboard side will be 'glassed and then at least two more coats of epoxy applied to both sides.  The final coat will contain graphite powder to make it as hard and slippery as possible--so it will glide smoothly through the water and into the centerboard trunk.  You may remember that the inside of the trunk was also coated with a graphite/epoxy mix.  There will be a lot of sanding of all the epoxy coats.  The centerboard will always "live" inside the trunk except when it is extended into the water below the keel, so I am not worried about the deleterious effects of sunlight on the epoxy, i.e., no need to varnish or paint it.  One less maintenance worry--the centerboard will be extremely difficult to get at once the boat is finished.