Saturday, March 29, 2014

Cradle to Keelson


Cradle Bracing
You can't see much of the cradle in this shot.  What you can see is the bracing that is holding the cradle pieces upright and properly spaced.  You can also see part of the keel and centerboard trunk which have been dropped into slots in the cradle.  The cradle helps with assembling the boat--holding the panels in place and in proper alignment while they are stitched together. 
Caster Under Bracing


You can see in this shot that I have deviated from the instructions a little by installing casters under the cradle bracing.  The casters only raise the cradle by about 1/2".  They will enable me to move Jan's car out of the garage and roll the boat out where I can work on it.  When I have finished for the day, all I have to do is roll it back against the wall and move Jan's car back in the garage.
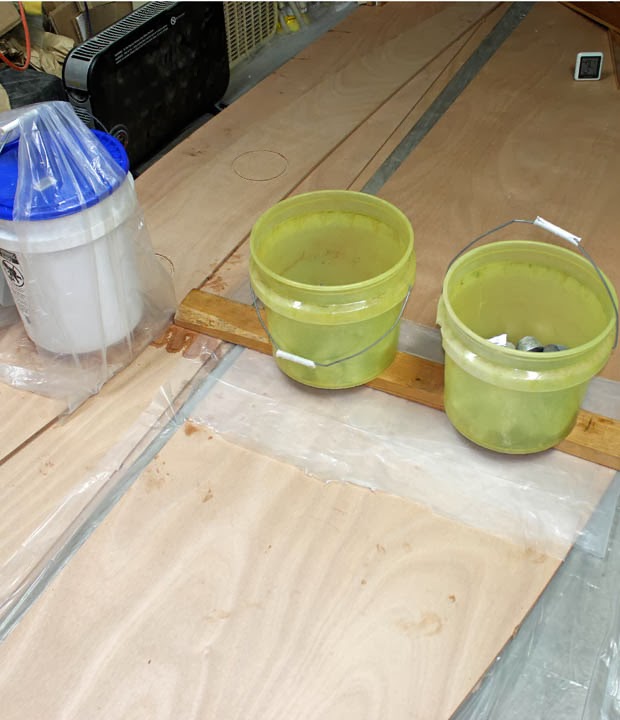
Aft Keel Cap Glued and Clamped


The aft section of the keel has a cap that covers both the lead-filled area and the hollow area.  It is glued in place and sealed so no water can ever get in.  I "laid" the keel in 2013, so I sealed a 2013 penny inside it--supposed to be good luck.
Shown here I have a bunch of clamps in place to hold the keel sides against the cap while the glue cures.  In the foreground is the little electric heater that has done a very good job of keeping the garage temperature warm enough for curing epoxy.

Keelson Glued and Clamped


The keelson (keel's son) has been glued and clamped to the top of the keel.  In this shot you can see most of the keelson and a good bit of the cradle.
Aft End of Keel and Keelson
Forward End of Keelson


Here's a closer shot of the aft end of the keelson.  I'm really glad to have this part of the work finished.  My next few steps will be to stitch the bilge panels and side panels in place, followed by the transom.  When I get those parts in and glued, I'll really feel as if I'm starting to get somewhere.


The manual calls for gluing the keelson in place about 20 steps before I did.  This picture of the forward end of the keelson shows you why I decided to wait.  The keel itself weighs about 150 pounds or more and there is no way that skinny little piece would not have been broken off during one of the times I had to move the keel or when I wrestled it onto the cradle and dropped it in place.  The clamp on the tip is to add a little weight during the epoxy cure.

Friday, March 21, 2014

Learning to Love Sanding--List of Bloggers

Started arduous sanding of side panels.  I hope to get them done and start on the building cradle this weekend.

Ready for Sanding
Here is part of the first panel ready to start sanding.  It's hard to tell from this picture but the epoxy is very glossy.

Getting Started


In this shot I have just started the sanding.  You can see dull areas and shiny areas.  The shiny areas are low spots, so when everything is uniformly dull, I'll have a very smooth surface.
A Bit Further Along


 Here I'm a bit farther along.  A lot more dull than shiny.
Ready for Finish Sanding


And in this shot, the initial sanding is finished.  No shiny spots.  I'll be sanding it down a bit smoother with a finer grit later.


I've added a list (below) of several other blog sites so you can get an idea of what others are doing and some examples of very fine work.  One of the best is not really a blog, just pictures (flickr.com) but they definitely tell the story.  

http://sunmonkeypocketship.blogspot.com/ 
http://pocketshipadventure.blogspot.com/
http://arniesark.blogspot.com/
http://petitbateaux-boat.blogspot.com/
http://pocketship.blogspot.com/
http://buildingpocketship.wordpress.com/
http://www.flickr.com/photos/35243545@N02/
http://gallery.me.com/jermcmanus
http://leeboatworkspocketship.blogspot.com/


Friday, March 14, 2014

Two More Side Panels Glassed--First Epoxy Coat

I decided to stop trying to work on the panels with them on the floor.  Hurts back and knees, and it is nearly impossible to keep debris from falling into the uncured epoxy.  And I found it was much easier and quicker to get things coated and smoothed out with the panels on a table.
Opposite Side and Topsides Panels Covered With Fiberglass Cloth
So I built a makeshift table from two full sheets of plywood on three sawhorses.  The ends of the plywood panels are screwed to the middle sawhorse.  Above you can see the fiberglass cloth laid out over the second side panel and second topsides panel.  I took the picture after laying the cloth, but before waiting for the ambient temperature to start to drop before adding the epoxy.  Otherwise, if the temperature is rising, the gases inside the wood will start to expand and "outgas," creating bubbles in the epoxy.

I know, you can't really see the panels for the cloth, so here they are after applying the first coat of epoxy.  You can see how the epoxy makes the cloth almost transparent.
Second Side and Topsides Panels After Fiberglass and First Coat of Epoxy
The weather has warmed up here quite a bit (72 degrees in the garage when I applied the epoxy), so I should be able to apply the second coat early tomorrow morning.  (Temp will be rising but I won't have to worry about outgassing then--the wood is all sealed up on that side.)

Looking ahead, I have to add two more coats to these panels and to the floor joists, then sand them all until I go insane.  After that I'll assemble the building cradle and drop the keel into it.  I have a little more work to do on the keel and then I can start stitching* the bilge panels to it and then the side and topsides panels, followed by the transom.  At that point you will start to see something that looks like a boat.   *Stitching:  All this means is that the panels are all held in place with short bits ("stitches") of wire.  After the panels are stitched together, thickened epoxy glue is applied between the stitches.  When that cures, the stitches are removed and more epoxy is filled in where the stitches were. 

Saturday, March 8, 2014

Prepping Hull Panels

Quite a bit of work has been done over the past week or so, but I don't have a lot to show for it.  I have begun fiberglassing the insides of the side and topsides panels of the hull.  The bilge (bottom) panels are not 'glassed at this time, partly because it would be much too difficult to force them into the proper shape. There are other reasons which will be easier to demonstrate as the boat comes together.

Upper Panels Final Coat
Upper Panels Fiberglassed
On the left are a side panel and a topsides (smaller) panel right after applying a layer of fiberglass cloth and adding the initial coat of epoxy.  (Panels appear curved because of wide angle lens setting.)

On the right are the same two panels after applying two more coats of epoxy.  I only have room to do two panels at a time. 

Not much difference between the two pics, except you can see how much glossier the epoxy is after the finish coats.  That will all be sanded down to a uniform dull finish.  Any shiny areas will help to detect low spots.  The sanding is kind of a balancing act for me.  I want to get the surface as smooth and flat as possible, but at the same time I don't want to sand down into the fiberglass weave--or worse, down to the wood!  I'm amazed I was able to get the entire length of the panels into the shots.  They are about 15 1/2' long.

This is probably all I will be able to do for a while.  Unless plans change, Jan and I are headed for L.A. a week from today and will probably return in a little under a week.  I'm keeping the garage at about 55-60 degrees, which means the epoxy will take approximately 7 days to fully cure using a medium hardener mix.  Obviously, I don't want to leave the heater running while we are gone.  We're expecting some warmer weather this week, so I'm hoping the heater won't have to run all that much while we are here.  I'm feeling guilty enough as it is.  I have added insulation to the garage door, and it seals very well around the edges, so that helps.  I just wish the garage itself was insulated.  If I ever start another boat project I will probably do that first.  I was thinking of building a small tent of clear plastic sheeting over the whole thing, but decided that would be too dangerous.

Tuesday, March 4, 2014

Stillwater OK Weather

Just a quick post:  Here's why I haven't been doing a lot of epoxy work lately.

My Back Yard, March 3, 2014
According to the Weather Channel, it's 1 degree F out there.  Don't want to waste too much energy heating the garage in this weather.   The weather should be warming back up to normal in a few days.  Mind you, I'm not complaining.  All I have to do is remember what it can be like here in July and August! 

Sunday, March 2, 2014

Floor Joists and Hull Panels

Gluing Keelson and Epoxy on Floor Joists
 I've got a little more done over the past week or so.  Here you can see the floor joists with a coat of epoxy on one side.  They will need at least two coats to prevent water infiltration.  They'll be really hard to get at once they are installed in the boat, so now is a good time to get them sealed up.  The boat is designed to stay dry on the inside, but water can get in there, e.g., when the companionway doors are left open and there is rain or a lot of spray.  So I don't want any wood to get wet in there and start causing problems.
In the background you can see the "keelson" being glued together.  It is also longer than 8 feet.  The keelson (keel's son) will be glued to the top of the keel over the lead pours and hollow area.

Gluing Hull Panels Together
Plywood only comes in 8-foot lengths, so to get the nearly 16-foot panels I need for the hull I have to glue two pieces together end-to-end.  Because I bought the kit, "finger joints" are provided for that purpose.  This is a good way to get a really secure joint and helps keep the panels aligned.

Finger Joints
Below that is a picture of the finger joints.  I couldn't take a picture of them while the joints are gluing under weights.  There is 100 pounds of lead in those buckets on top of the joint.  You might recognize the ingots I poured earlier. I shot the picture of the finger joints after I glued some more hull panels together, so you only see  a few of the fingers.  Anyway, you can get a pretty good idea of the concept.  The Skerry featured "puzzle joints."  That is they were shaped similarly to jigsaw puzzles, with larger round, interlocking areas at the ends of the fingers.  This really helped keep things aligned properly.  I don't know why they didn't use them on this boat--a later design.  There is a big puzzle joint on the keelson.
Gluing Bottom Panels and Top Panels


I didn't start work on the bottom panels before now because they are too wide for my makeshift shop table.  I spent most of yesterday clearing everything out of the way and dismantling the table (two sawhorses and a narrow sheet of plywood).  Now I'm gluing more of the hull panels on the garage floor. The yellow buckets contain 50 lb. of lead each and are weighing down the bottom panel joints.  The weights are there to make sure the "fingers" all lay flat.  To the left you can see the top panels being glued.  I didn't have any more lead, so the white bucket is full of water.  It only weighs about 30 lb., but that should be enough.  The top panels are sitting on top of the middle hull panels I glued previously, and just to the right of the white bucket you can see the finger joints I took the above closer picture of. 
Hull Panels

This is a slightly wider shot of the six hull panels.  Each pair is glued simultaneously, one on top of the other, with a sheet of plastic between.  The epoxy glue won't stick to the plastic.  I couldn't get a very good shot of the entire length of the panels, but you get the idea.  As I said, they are almost 16 feet long.

You can barely see two circles on the top hull panel--one is partially obscured by the white bucket.  That's where the two portholes on each side of the boat will go.

Today's high is 21, so I didn't want to do any epoxy work that requires the garage to be heated above about 45 or 50 degrees.  It's OK to do gluing at 45 or above, but not clear-coating. The temp should be at least 55 for that.  I got some sanding done on the two Skerry parts (daggerboard and rudder section), and finished sanding the PocketShip's centerboard.  The centerboard is very smooth and should glide smoothly in the water and in and out of its trunk.

Pretty soon I need to start thinking about a name for the boat.  Jan thought of the name "Freedom" for the Skerry.  Any ideas for the PocketShip?  Think about it and let me know if you come up with something.  So far I am drawing a blank.