Friday, May 29, 2015

Rub Rails and Companionway Hood Top


Companionway Hood Top

I've temporarily mounted the companionway hood on the boat so I can be sure the sides stay in exactly the right place while I glue on the top.  
Gluing Hood Top, Rear View
Gluing Hood Top, Front View
You can see that the top is a bit larger than the hood, to be cut to size later.  There is also a curved bar at the rear of the hood to hold it to the proper shape.  The companionway door will slide under the hood.  After the top cures I will remove the hood, to be installed permanently later.  While it is off the boat I will build the sliding hatch and make sure it fits properly.  Adjustments will be much easier to make with the hood off the boat.

Rub Rails

As you may remember the rub rails have been scarfed together to get them up to about 17 feet in length.  Now I have sanded them down and beveled the sides on all six pieces--three per side to be built up one at a time.
Port Rub Rail, First Layer

The first layer of the port rub rail has been glued in place, to be followed by two more layers, each tapering down to a slightly smaller size.
Starboard Rub Rail, Trial Fit of Layer One
Here's a shot of the first layer of the starboard rub rail trial fit.  The manual calls for that to make sure the alignment is good and not "lumpy" looking, but it's pretty easy to get it right because you line it up right against the edge of the topsides panel.  Since taking the picture I have sanded the side and glued the first layer on.

Saturday, May 23, 2015

Toerails, Rub Rails and Companionway Sills

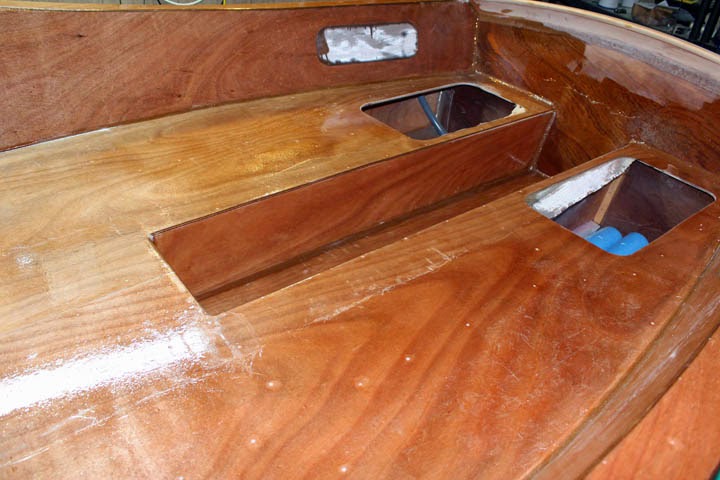
Toerails are needed along the sides of the cabin deck because access to the front compartment (anchor well) is sometimes needed while on the water.  The toerails are there to help keep you from falling in.  Here are the toerails being glued in place.  The anchor well is to the left.
Toerails Gluing
Builders please take note: The plans show the toerails beveled equally on each side, but if you look at the picture in the manual you will see that one side is at a 90-degree angle and the other side is beveled.  I noticed this too late, but I think it would have worked better.  That is, the perpendicular side would be inboard and give more purchase, while the beveled side (outboard) would be more beveled and closer to being parallel with the hull at that point.  As I say, I noticed too late, but if you choose to do it according to the picture I think it would be an improvement. 

Quite a lot of time has been spent over the past couple days with rub rail and companionway work.  The rub rails will be built up with three layers of mahogany strips.  I started by cutting strips of 3/4" x 1 1/4, 3/4 x 1 3/32, and 3/4 x 15/16.  The rails will be over 16 feet long so I had to glue together two 8-foot lengths and one 4-foot length for each rail strip.  Here are the strips clamped and glued:
Rub-rail Strip Scarfs Gluing
I used what is called a scarf joint to attach the pieces together.  This is done by cutting long bevels on the ends to be glued.  A 10:1 scarf is called for, so I made 8 1/2" long scarfs along the 3/4" width of each piece.  Here is a closeup of some of the scarf joints:
Closer Shot of Scarf Joints
The easiest way to cut the scarfs is to build a simple jig that slots into the tablesaw top, shown here:
Scarfing Jig
I guess I should have shown it on the saw itself, it's function would have been much clearer.  Anyway there is a strip of wood on the bottom that holds the jig in alignment as it slides along the saw table.  The strip of wood on the top is at a 6-degree angle and the piece to be scarfed is clamped to it and sawn.

Next the rub-rail strips will be beveled on each side and glued to the boat, one at a time.  That will be shown in a later post.

While the rub-rail strips are curing I have begun work on the companionway opening.  The first step is to glue a plywood insert to the inside of the rear cabin wall, as shown here:
Companionway Insert and Sills Gluing
 Before that is glued in though, the bottom of the cabin wall is beveled downward so water doesn't stand there.

Next, sills are made for the top of the opening and glued in place:
Companionway Sills Gluing
While all that cures I'll be working on the companionway hood and slide.  All of this will form a system that is supposed to keep rainwater out of the cabin.  I have read reports by other builders and they all say their cabins stay remarkably dry (unless they forget to close the hatches).

Wednesday, May 13, 2015

Installing Transom Skirt Trim; 'Glassing Cockpit and Cabin Deck

Installing Transom Skirt Trim
The transom skirt and trim finish the top of the transom.  (Sorry, didn't get any pictures of installing the transom skirt itself.) The trim is fashioned from two lengths of wood cut into trapezoidal shapes along their length.

 Here the first piece of the trim has been glued in place in clamped.  The second part is lying across the boat in front of it.

The second part of the transom skirt trim has been glued in place and clamped.  I found it very difficult to make the second part conform to the curve of the skirt (front to back) because the clamps slipped off the slanted skirt.  So I resorted to brads to hold it in place.  There is a small gap but that will be easy to fill.
 This is the finished trim, ready for epoxy later on.  A little hard to see, but I think you get the idea.


Fiberglassing Cockpit and Cabin Deck


Jan felt the blog should include more pictures of me, so here I am pretending to sand the starboard cockpit seat . . .


                          and the starboard seatback.


In this shot fiberglass sheathing has been applied to the cockpit seats.


And here the seats have their first coat of epoxy applied.


In this shot fiberglass sheathing has been added to the footwell, and the seats and footwell have all had two coats of epoxy applied.  I was unable to get back and add the third coat soon enough, so I will have to sand the whole area before I can apply it.


So, I added the sheathing for the cabin deck and applied its first two coats of epoxy.  After that cures I'll give the cabin deck and cockpit a good sanding and apply the third coat to both.