
Sheave Installation
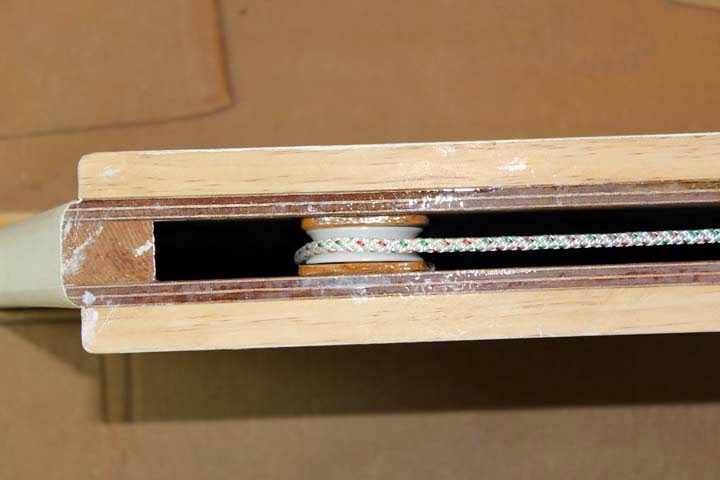
The manual shows installing this sheave (like a pulley) later on, but I felt it would be easier to do it now. The sheave is nylon, and I have added wood shims to each side so the centerboard pendant can't slip off the side of the sheave.

A bit of line has been threaded through the hole at the back of the trunk and over the sheave, down to the outside of the boat. This line will be used to pull the centerboard pendant into place later on.

Here's the threading line through the hole and a grommet. The grommet will be pounded into the hole later after some epoxy work is done. When the grommet is installed and the pendant threaded into place, the pendant will be used to raise and lower the centerboard.

Here's a shot of the sheave bolt. The notch for the bolt (and nut on the other side) was my idea. Otherwise I would not have been able to tighten the nut. I also used a lock nut instead of the acorn nut called for. Not as pretty, but it will never loosen on its own.
Cockpit Footwell and Seat Installation

Here is a shot of the just-installed cockpit footwell with fillets,

and another shot of the outside of the footwell.

This shows the cockpit seats glued in place. The black spots are the heads of drywall screws which are only there to hold the seats down during gluing. They will be removed and the holes filled after the glue cures.
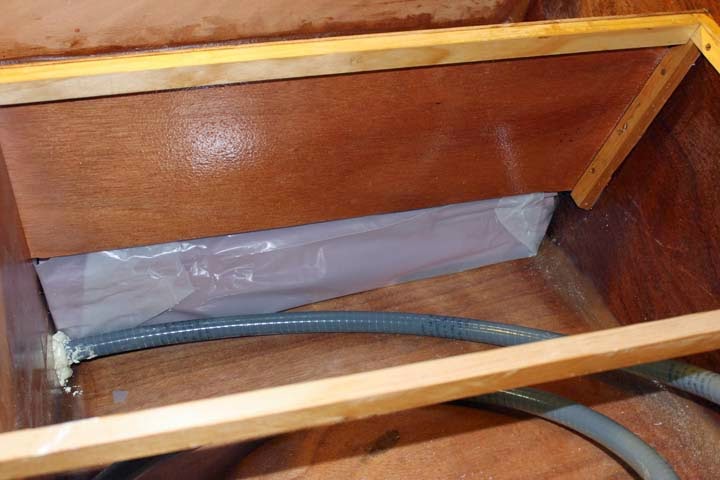
Under the footwell I have added several layers of sheet foam for floatation if the boat is swamped--one of many areas of floatation foam to be added. Although the foam is "closed cell," if it is in water for a very long time it can begin soaking it up, so I have put sheet plastic around the foam. There was no point in trying to put the plastic all around the foam and seal it up because then I would not have been able to stuff it in there. Instead the plastic goes up to about the level of the bottom of the footwell. The corners are secured with storage tape. As long as I don't get more than a few inches of water in there it should be fine. If the compartment is ever completely flooded then I'll have to reach in and pull the plastic out. From then on if it gets wet I will have to pull the plug and let it slowly dry out.
Bow-eye Backer
 Although the manual calls for installation of the bow-eye much later (after the boat is mostly complete), I felt that would be almost impossible to do--at least for me. The bow eye is installed in the stem end at the front of the bow compartment, which is sealed up except for a small inspection port, and you have to crawl partway into the storage compartment to get to the inspection port. Also the eye's bolts are attached to a small metal plate that is pulled against the stem end. Since this eye is used to pull the boat onto the trailer and help hold it there during travel, I felt that it needed more backup. To that end, I drilled two oversize holes for the eye's bolts and filled them with thickened epoxy. Then I embedded a shaped stick of wood in more thickened epoxy over the holes. As you can see the wood is only held in place with tape during the cure. I did this so there will be a layer of thickened epoxy between the wood and the hull. The wood is about five inches long and 1 1/2" wide, which should spread the load quite a bit. After the epoxy cures, I'll drill the proper size holes through the oversized holes in the hull and on through the wood backer. Then I'll oversize the holes in the wood, fill them with epoxy, and drill properly sized holes when the epoxy cures. Whew! I can't permanently install the bow-eye until the outside of the hull is finished, but at least the holes and backer will already be there. I'll just have to cut away the fiberglass on the outside. After the hull is painted I can install the bow-eye. Double-whew!
No comments:
Post a Comment