Thursday, April 20, 2017

Steam Box: Ready to Begin Repairs Now That Camper is Finished (almost)

I ordered a Steam Bending Kit from Rockler some time ago and finally got around to building the steamer box for it.  The steamer will be used to bend new stringers into the proper shape to fit the bow.

Today I'll get started on "lofting" the small part of the plans for the bow of the boat. 


The next step after that is to build a form for the stringers, which I also hope to start on today.  So far, it looks like the weather will remain perfect for epoxy work for a while, so I hope to get out there and get started very soon.

Sunday, October 16, 2016

Damage and Prep for Repairs

A couple weeks ago I went to the Sail Oklahoma "Messabout" on Lake Eufala and met Charlie Huie there, who is from near Little Rock and has also built a Pocketship.

 Here's Charlie sailing his boat on our second day there.  It was really windy the first day we went out--bad idea.  I went aground once and wound up with a hematoma from wrestling it back afloat.  When we got to the rendezvous site, it turned out to be on a lee shore.  Had to have help getting out of there. 
This is our "next door" camper, Al Stead, who came down from Minnesota.  Al went along in my boat the second day and taught me a heck of a lot about sailing in a very short time.

Here comes the bad news (other than my hematoma and trip to the ER, etc.).  After Charlie helped me get my boat back on the trailer, I headed off to our campsite to help him with his--maybe 200 feet away.  I was not expecting overhead power lines and learned about them the hard way.
As the mast fell, the bowsprit was ripped in half.  Luckily it was ripped longitudinally so I should be able to just glue it back together and get some more use out of it.
The breasthook came out with the bowsprit.  I was planning to redo it some day anyhow, just not so soon!
What's left of the breasthook, which we finally found inside the cabin.  I also damaged the tabernacle, but it was temporary anyway until I can get some white oak to replace it with.  Again, just not so soon.
 I ordered a portable garage to do the repairs in and assembled it yesterday.  Will need to keep exposed areas out of the weather, and will have to keep epoxy sections warm from time-to-time.
Here's poor Gaia, sans bowsprit and breasthook, inside the "garage."  You can't see the damage to the tabernacle, but the wood was ripped out above the pivot holes.  I can't find any damage to the mast other than a few dings.  Would much rather replace the tabernacle than the mast--glad it is only bolted in.  I see no reason to glue the replacement tabernacle in either--all the lateral strain is taken up by the shrouds and forestay.
Friday, December 11, 2015

Companionway Step-Stool and Probable Last Sail of Season

I have cobbled together a small stool with steps leading from the cockpit bridge down into the cabin:
The stool is a great place for a passenger to sit, and some who have built similar stools sit there to pilot the boat.  I also stand on it to raise the mast--a huge help as it puts me farther forward and about six inches higher.  (The black outlines are rubber pads I glued under the feet.)
The steps are a bit steep for strength since I will be standing on the stool.  You can also see that the cutout for the centerboard trunk is a bit off-center.  I decided on that when I was checking the fit so that the feet would not sit right on the grooves between the floorboards (still got it a little off).

My stepson, David Garvoille, is here for a visit so we took the boat out on the Dec. 9 for an afternoon sail.  I imagine this will be my last chance for a sail this season.
 Dave shot a selfie of the two of us while sitting on the new companionway stool.
Here's Dave at the helm.  He says a friend gave him few lessons back in the early 80's.  Turns out he is a much better sailor than I am!  I guess I was too old and fearful when I started learning. :-)

Sunday, October 25, 2015

Gaia's Shakedown Cruise

First, here's a shot of the sail cover I was able to buy through Charlie Huie (Captain Charlie).  Contact him to talk about purchasing one if you are interested.
It's very nice and a reasonable price.

I finally was able to get the boat under sail today, with help from Penny Ferleman and John Griffin.  Here are some of the pictures from the voyage:

Here I am backing the trailer into the water.

I had to push it back a bit so I could re-connect the bobstay over the bow roller.
Penny

John
Raising the mast.

Raising the jib.
Trying to look like the wise old sailor--not succeeding.

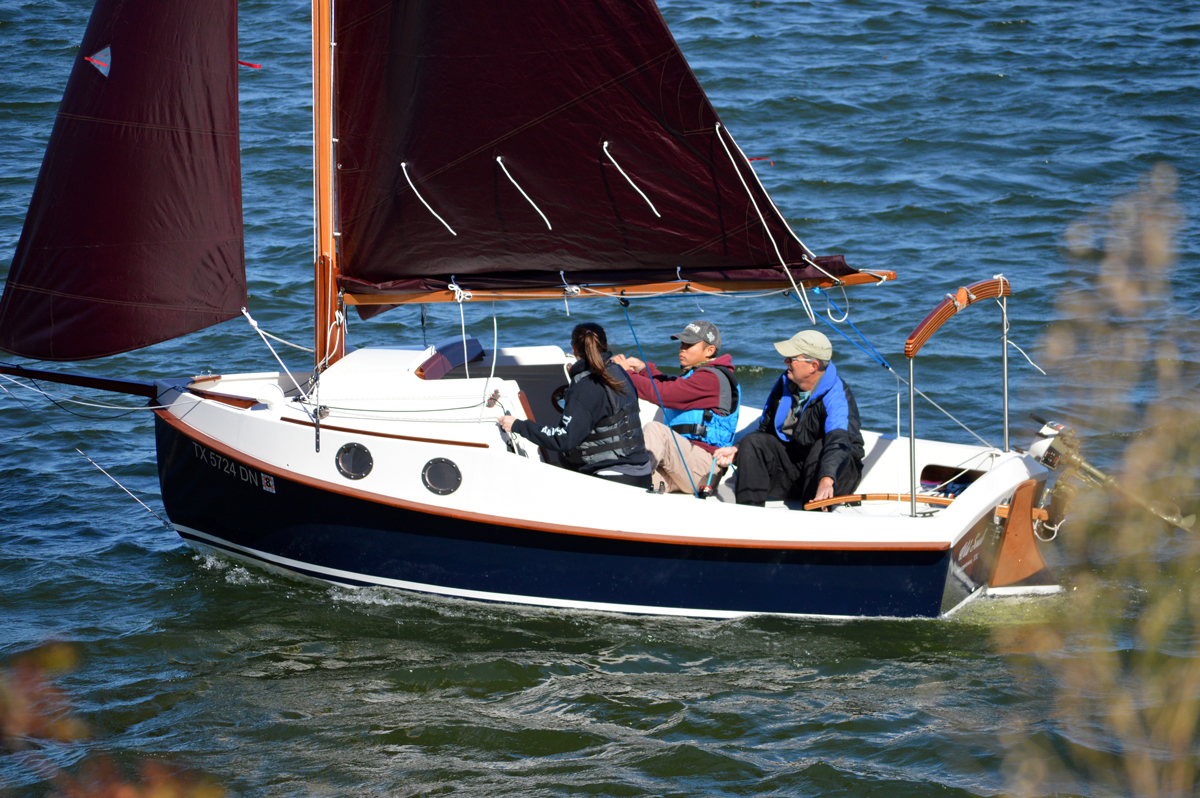
John and me at the helm and jib sheet.
Nice shot of the Armed Forces Memorial.

Penny relaxing in the cabin.  As you can see I still have some sanding and painting to do.

Returning to the dock.
Tying up.

Replacing the sail cover.
After a job well done.
This turned out to be a perfect day for a sail, especially my first sail in a new boat.  The temperature was in the upper 60s with variable winds averaging about 10 knots.

Thursday, October 15, 2015

It Floats!

I have not quite completed the rigging, but I have raised the mast and "bent on" the sails.


I hope to finish rigging in the next day or two, so no sailing yet, but I did take the boat down to the water to test some things, e.g., lowering the centerboard and using the little outboard.  I also took the opportunity to modify the trailer while the boat was in the water.  Now she sits on rollers instead of a wet, carpeted board, so the keel will dry better and I can inspect/repair it as needed.  I got this one shot of her sitting on the water before taking her for a little test spin:

Wednesday, October 7, 2015

Starting Installation of Mast and Spars

Here's a test fit of the tabernacle, mast, and bowsprit.  Gives a little better idea of how things will come together:

I have finished coating the tabernacle and mast with epoxy and then coating them with varnish.  Here they are mounted on the boat:
You can see the pivot bolt at the top of the tabernacle.  When I get everything rigged, the mast will swivel upright for sailing and back down for trailering. 

Here's a closer shot of the sail track on the mast.  The mainsail will come with "cars" attached that will slide along on the track when raising or lowering sail:

The other three spars (bowsprit, gaff, and boom) have had all three coats of epoxy applied.  Now they just need sanding and varnishing.  I'm still waiting for the sails,which should come in some time next week.

Thursday, September 24, 2015

A Major Milestone

I have most of the boat itself finished, except for the interior of the cabin which I may wait until winter to work on.  The boat is now living outside so I have room to work on the spars and, more importantly, get Jan's car back in there!  Here's a shot of the boat now sitting out in the yard.  It's a bit over-exposed so there is some lack of detail, especially at the bow end.

Another shot from the stern end:

I got the dropboards (actually they are acrylic) assembled and in place.  The lock won't do much to prevent entry, but at least it will require breaking in, which should keep casual thieves away.
I don't have a shot yet, but this morning I added a lip on the companionway hatch slide so it covers more of the dropboards.  I'm afraid, though, that the lip will just channel the water to each side where it can pour right in--we'll just have to see.  Still, it won't be much of a problem, just a bit of water I'll have to pump out now and then. [UPDATE: Yesterday I noticed near the back of the manual that you are supposed to insert a block under the hasp to move the hatch back over the drop boards about 1 1/2", so rain won't flow into the cabin.  I'm working on that now.]

Here's a shot of the solar panel now that it is installed.  I'm amazed that I was able to find a panel with dimensions that almost exactly match the companionway hood.  It's almost as if it were designed for this boat.
My next job is to finish the mast, spars (boom and gaff), tiller, gallows, and tabernacle.  I have those items all built, but what I have to do now is drill a few holes here and there, cover each part with three coats of epoxy, then three or more coats of varnish.  I anticipate that taking two-to-three weeks, and then I do the rigging.  I am still on schedule (just barely) to get the boat on the water before it gets too cold.